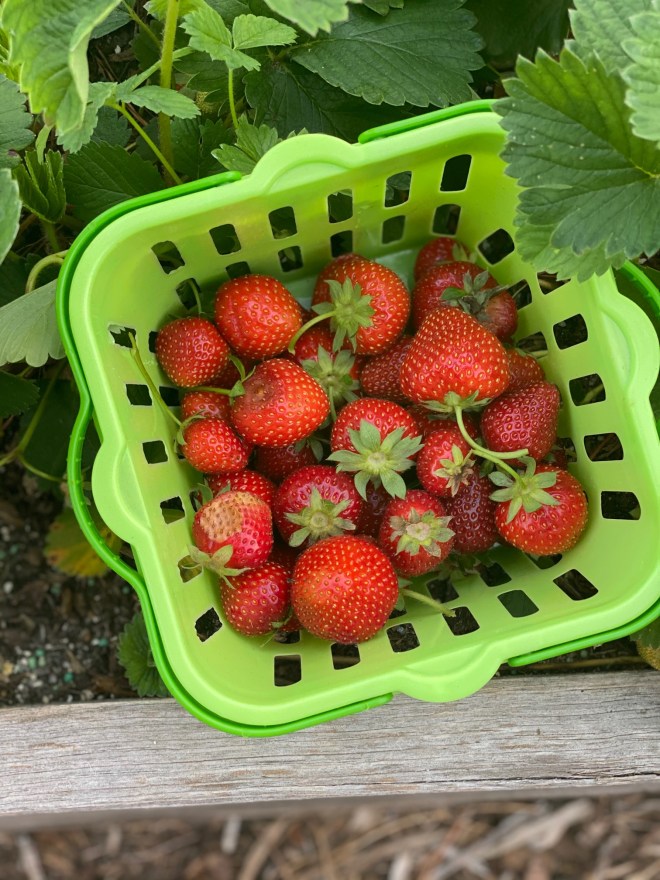
My family’s very favorite fruit is strawberries, and we usually buy LOTS of them in the spring! They are full bloom here in NC right now and I will generally buy at least 10 gallons of them. We eat them fresh, freeze in 1 quart portions to have all winter, and make strawberry jam. It’s my husband’s absolute favorite jam, and he loves a crunchy peanut butter sandwich with homemade strawberry jam.
I’ve always wanted to grow my own, and I’m finally making progress this year. When I built my raised bed garden last spring, I built a 2 foot by 10 foot long bed for strawberries. That will comfortably fit about 20 strawberry plants. With strawberries, they will produce some their first year, but they really do better the 2nd year after they have gotten established. I planted those first 20 plants last year (10 Sweet Charlie variety and 10 Ozark Beauties) and they went crazy! Strawberries send off runners in order to keep producing new plants, so I ended up with a box full of plants! I cleaned it out in late winter and ended up having about 100 rooted strawberry plants! I kept 20 in my original box, made 2 more boxes of 36 plants total, and then shared about 50 extra plants with a friend!
So my original plants are producing so well this year and I haven’t had to buy any from local farms. It’s so rewarding to walk out there this week and pick a quart or two a day. I’m excited that by next year, I’ll have 3 thriving boxes full of plants. So for now, I picked this week and added them into a bag in the freezer until I had enough for a batch of jam.

If you haven’t canned anything before, jelly or jam is an easy one to do. I don’t do anything fancy-I follow the recipe in the Sure Jell box!
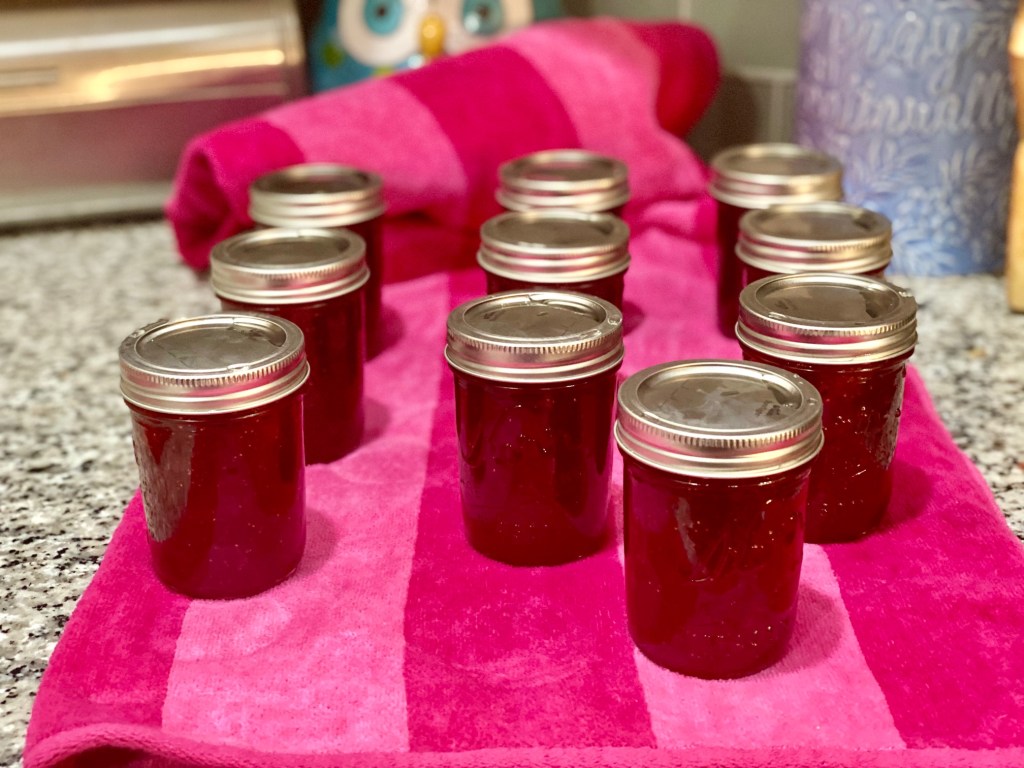
My recipe called for 8 cups of fresh strawberries. I used those and ended up with 10 one cup jars of jam!
For canning jelly, you’ll want:
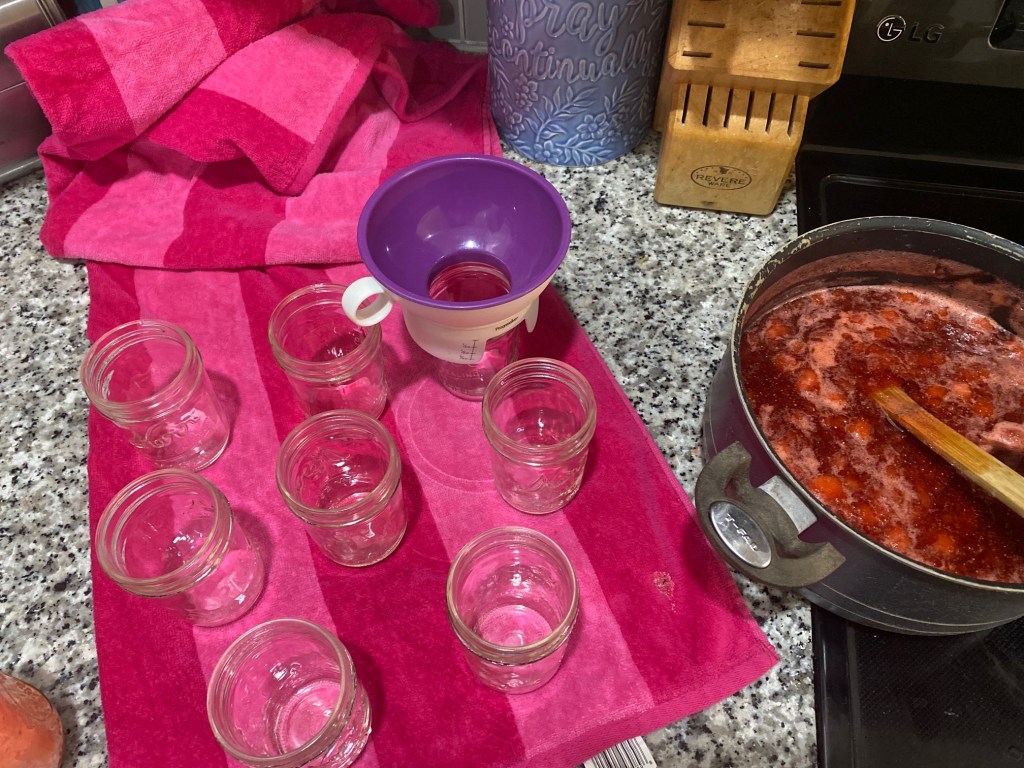
- clean, sanitized jars (I sometimes run mine through a hot cycle in the dishwasher)
- clean rings and lids to fit the jars (I have a pot of boiling water and throw them in there for a few minutes)
- a clean working surface with a towel
- a jar lifter (mine is similar to this one)
- a canning funnel (my favorite one is this one that fits over the jars to minimize mess)
- a large pot that will fit your jars with at least an inch of water over the top
Follow the directions on your packet to make the jelly. That process honestly takes less than 10 minutes! Then have your clean, hot jars on your towel on the counter. Place your funnel on top and spoon your jelly into the jars. I usually just use a ladle or a measuring cup to scoop it into the jars. (During this time, I have a pot of water on my stove for my actual jars and start warming it up to boiling.)
Now you’ll want to use a clean washcloth to wipe the edges and tops of your jars in case you dropped anything onto those. You don’t want anything that would prohibit your lids from sealing.
When the tops are clean, place your lid on top and then your ring. Finger tighten it. They will be hot from the jelly process, so you may want to have a hand towel ready to help hold it!
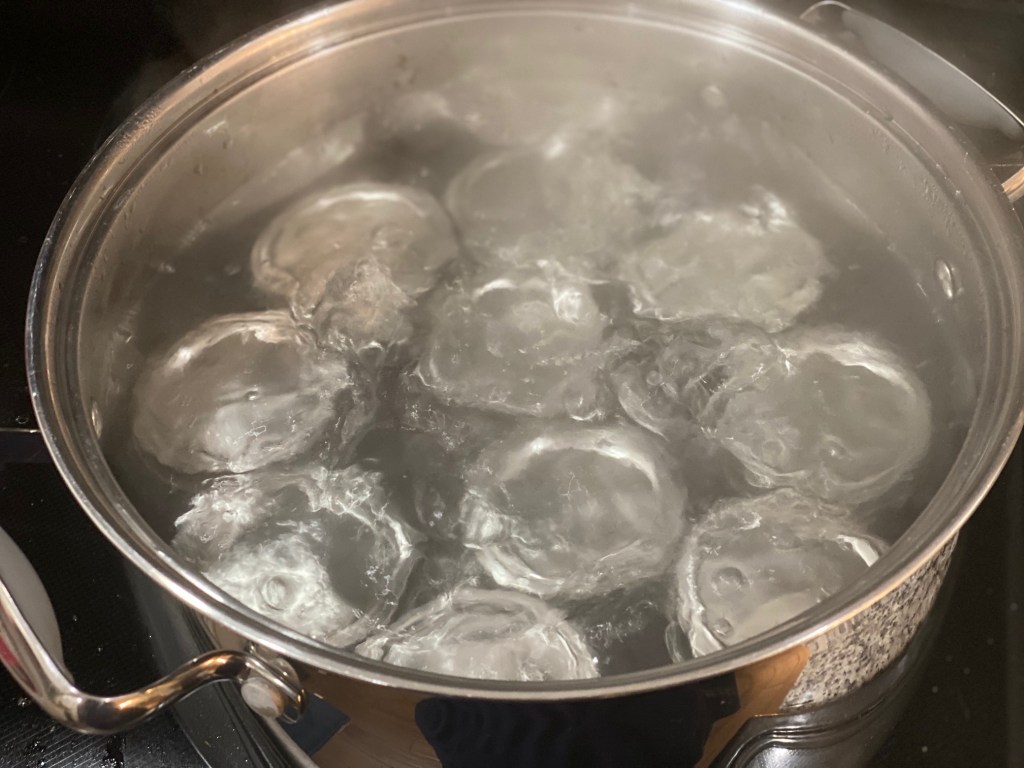
Use your jar lifter to gently place the jars into your pot of boiling water. You want the water to cover the jars by about 1 inch. Follow your directions on your Sure Jell box, but mine told me to boil for 10 minutes. This is called a water bath method for canning. Many canning recipes can just be done with water bathing, but it is very, very important that you know for sure that it can be done using that method. I can go into it with another post and supply some links, but some items can be water bathed and some require actual pressure canning to avoid botulism. Ball’s canning cookbook is SO informative about this subject and that’s where I first learned the scientific part of canning and how to handle it all.
Once your jars have water bathed for 10 minutes, you can use your jar lifter to lift them out of the water and place them on your towel. Now the fun part happens! You get to wait to hear those happy little *pops*. When the lids have sealed, you’ll hear it pop and you know that they are done. I leave mine overnight and let them cool completely until I move them to my pantry as I don’t want to jar them too early and interrupt that process. You will see an indent on the top of your lid and if you rub your finger over it, it won’t pop back up. Then you’ll know it’s sealed!
Jelly is so fun to make, and is a quick reward for all of your work! I love to make extra jars and give them as teacher gifts or pass them out to friends or neighbors as a thank you or swap for something they have shared with me from their garden. If someone gives you homemade jam, you know that it has been a work made with their whole heart!