

I’ve had lots of friends ask me lately about my raised bed garden that we are building at our new home, so I thought I would do a step-by-step guide of how we did this. I fell in love with “Square Foot Gardening” (SFG) at our other house when I had a much, much smaller space in which to plant, and the process WORKS! So I will outline the very basics of Square Foot Gardening, but I really recommend getting the book by Mel Bartholomew! It goes more into depth with charts on how many plants to put in each square foot, organically treating pests, etc. The whole premise behind SFG is having boxes with a grid system and a special soil mixture. It also can be less overwhelming because you are only watering, weeding, and fertilizing your boxes, not huge areas of dry ground. Here is how we constructed our garden:
Step 1: Build your frames.
SFG recommends 4 foot x 4 foot wooden frames to make it easier to reach the plants in the center. SFG also recommends using 2x6s that are 1 inch thick. I have done 2×6 boards and they work great! But I did go a little deeper with my new garden here and used 2x10s. Just be aware that it uses a LOT more soil. You cut the boards into 4 foot lengths, and Lowe’s will even do that for you. Then all you have to do is screw the 4 pieces together using 6 inch wood screws. Stagger the ends so it ends up square.
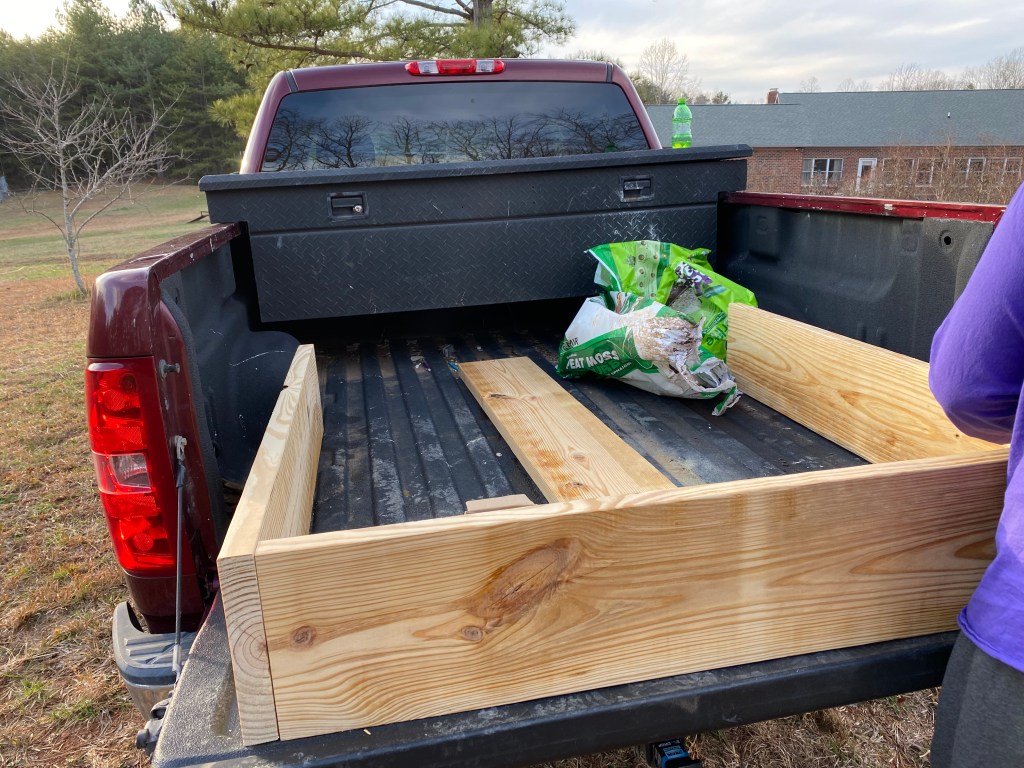
Step 2: Position your boxes.
Place the boxes on the ground where you would like them. If you’d like to beforehand, you can put weed barrier under them or line the bottom with cardboard boxes. I chose to put weed barrier so no weeds are able to grow up through them. I make sure to leave enough space between the boxes to pull my wheelbarrow and to be able to kneel to work.
Step 3: Fill your boxes.
Fill the boxes with “Mel’s Mix”, the soil mixture recommended by the author of Square Foot Gardening. This is probably the most tedious part of the whole process and can get pricey, but it really works! I have transplanted dying plants that were in the ground by placing into a box with Mel’s Mix, and they thrive! The mix is:
– 1/3 peat moss (available at Lowe’s)
-1/3 compost mixture (the more compost variety, the better)
-1/3 vermiculite (If you can’t do 1/3 vermiculite, it’s okay. I have done less because of its cost, and it has grown just fine! I have scored big bags of “coarse vermiculite” on Amazon before.)
I get leaf compost from a local mulch place for $25/truck load and also bags of compost from Lowe’s. Then I also compost my own vegetable scraps, eggshells, chicken manure, etc and add it to my boxes. It’s an expense at the beginning, but in later years, you no longer need to add peat moss or vermiculite. You only refresh the compost to add those nutrients that the plants love!

Step 4: Add your grid.
Add your grid to the top of the box to help you visualize the square feet in your box. You can buy wood lath for a few dollars from Lowe’s for this or you can use string. Once you get the hang of SFG, you may not even need the grids, but they are very helpful for new SFGers.

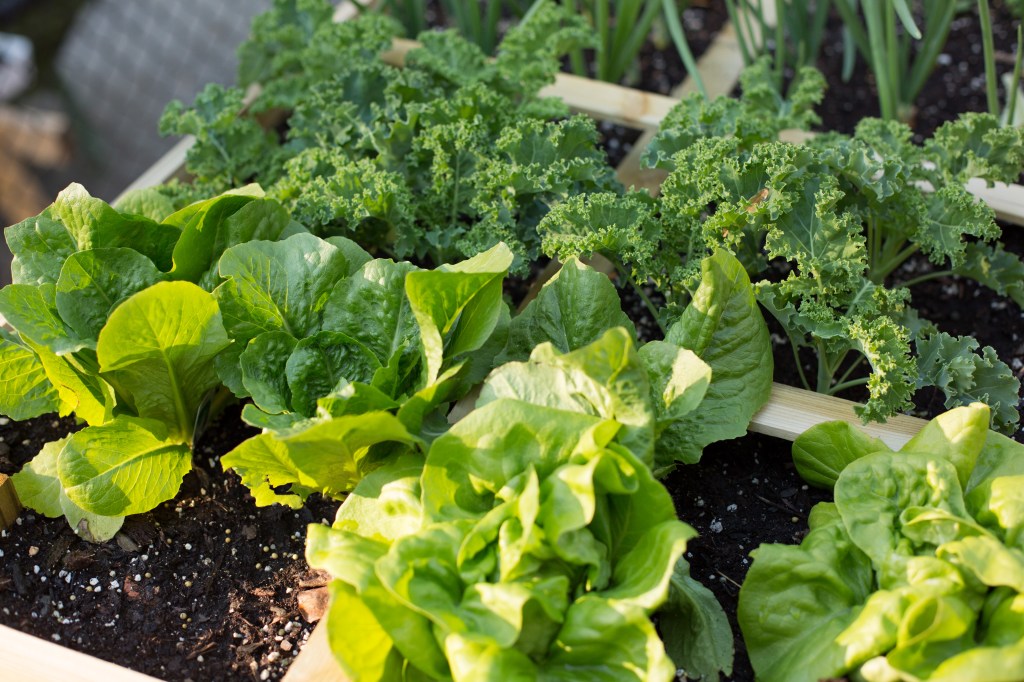
Step 5: Time to plant!
Now you are ready to plant! You can read my post here to learn about choosing your plants, when to plant, etc. Once you learn the basics of Square Foot Gardening, it’s fun to play around with different layouts and dimensions of boxes. I am so excited about my garden at our new house and am so excited to plant all of my summer crops!
Does this sound like too much? Start simpler! Build yourself some of the wood frames (they seriously take less than 15 minutes each to put together) and just fill it up with normal soil! Add some compost or manure and plant away! Mel’s Mix is GREAT and really works, but it’s okay to start much simpler and just feed your plants as you go! Plenty of people have traditional gardens with the soil that is already around them and are very successful!
Have fun gardening, no matter which way you do it!


I’m so glad you are doing this. I can’t wait see what you post next.
LikeLike
a beautiful set up! Looking forward to see growth…
LikeLike
I love how detailed this guide is about building a raised bed garden.
LikeLike