

One thing that I used to do regularly was to make homemade sourdough bread from a starter. When Gus was sick in 2017, feeding the starter was one of the last things on my mind, and I didn’t keep up with it. Now that life is a little more calm, I plan to start baking bread again. The recipe I use is called Amish Friendship Bread, also called Potato Flake Amish Friendship Bread. The starter is fed by potato flakes, so it is gluten-free and dairy-free. Those things usually sound unappetizing to me, but I promise that this bread is SO good! In fact, it was so popular that for a while, I was preparing it for Gus’s coworkers and selling it to them because they loved it so much! Sourdough type breads are also great for diabetics because it doesn’t spike their blood sugar like traditional breads can. And the fermentation process produces probiotics that are good for gut health. Aside from all of that, it is soooo delicious straight out of the oven with some butter and homemade jelly. Yummmm!!

Just a note-this starter behaves differently from other bread starters, so you’ll have to follow the directions below regarding feeding and storage.
To Make Your Initial Starter:
- In a small bowl, combine 1 package active dry yeast, 1 cup warm water, 1/2 cup sugar, and 3 TBSP instant potato flakes.
- Cover loosely and let it sit on the counter for 2 days. Make sure to stir daily. (At this point, I transfer mine to a 1 quart mason jar and cover it with a loose piece of aluminum foil that has holes poked in the top.) You will start to smell the fermenting process taking place. It will smell kind of “boozy”.
- After 2 days, add 3 TBSP instant potato flakes, 1/2 cup sugar, and 1 cup warm water and mix well. Cover it loosely and keep it on the counter for 8 hours. After this, put into the refrigerator for 5 days. After this time, you’re ready to feed it and use it for baking. It sounds complicated, but it becomes very easy after this!
Feeding Your Starter:
- Take your starter out of the refrigerator and stir well. Take out 1 cup of the starter to use for baking. If you aren’t going to bake, give it to someone else or just dump it. Then you only one 1 cup of starter remaining in your jar. Dump out anything extra. You need to keep one cup so it doesn’t mess up the balance of yeasts and sugars in your starter. I made a mark on my jar with a permanent marker so I made sure that I only had 1 cup of starter left in my jar before feeding again.
- Feed the starter just like we did above–3 TBSP instant potato flakes, 1/2 cup sugar, and 1 cup warm water. Cover it loosely and keep it on the counter for 8 hours, then put it in the refrigerator, stirring daily.
- After 5 days in the refrigerator, repeat these steps again of taking out 1 cup for baking, keeping 1 cup in your jar, and feeding your starter.

Now you’re ready for the best part-baking your bread!
Baking Your Bread:
- In a large bowl or in a stand mixer with a bread hook, combine 1 cup of your starter, 6 cups of bread flour, 1 TBSP salt, 1/4 cup sugar (optional–I’ve never added it to mine), 1/2 cup oil (vegetable, corn, or canola), and 1 1/2 cups warm water.
- Mix until dough is nice and elastic-usually 5 or 10 minutes.
- Place ball of dough in a greased bowl and cover with a damp towel. Let it rise overnight, about 12 hours.
- After 12 hours, you’ll see that the dough has risen tremendously! It will look similar to my dough in the photo at the top of the post.
- Punch it down and put it on a floured surface. You’re now going to knead it for several minutes until air bubbles are gone and you feel the texture change. I fold mine in half and knead with the heels of my hand, repeating over and over. I’ll turn it about 45 degrees and continue the process, adding flour to my surface or to the top of the dough if it is too sticky. You will feel when the dough changes and goes from a tougher feel to a soft, more fluffy dough. Then you know it’s ready!
- Grease 2 bread loaf pans. Split your dough and add it to each pan, spreading out the dough so it reaches the sides. Now you’re ready for your second rise. Loosely cover it (I use plastic wrap or a very light dish towel) and let it rise 6 to 8 hours. You will be able to see when it has fully risen-it will have a nice, rounded top! Don’t let it sit too long or it will actually rise, then collapse on top of itself and you’ll have to start the process all over again!
- Preheat your oven to 350 degrees and only leave a rack in the middle of the oven. Gently place your pans on the rack and cook for 30-35 minutes until your bread is golden brown.
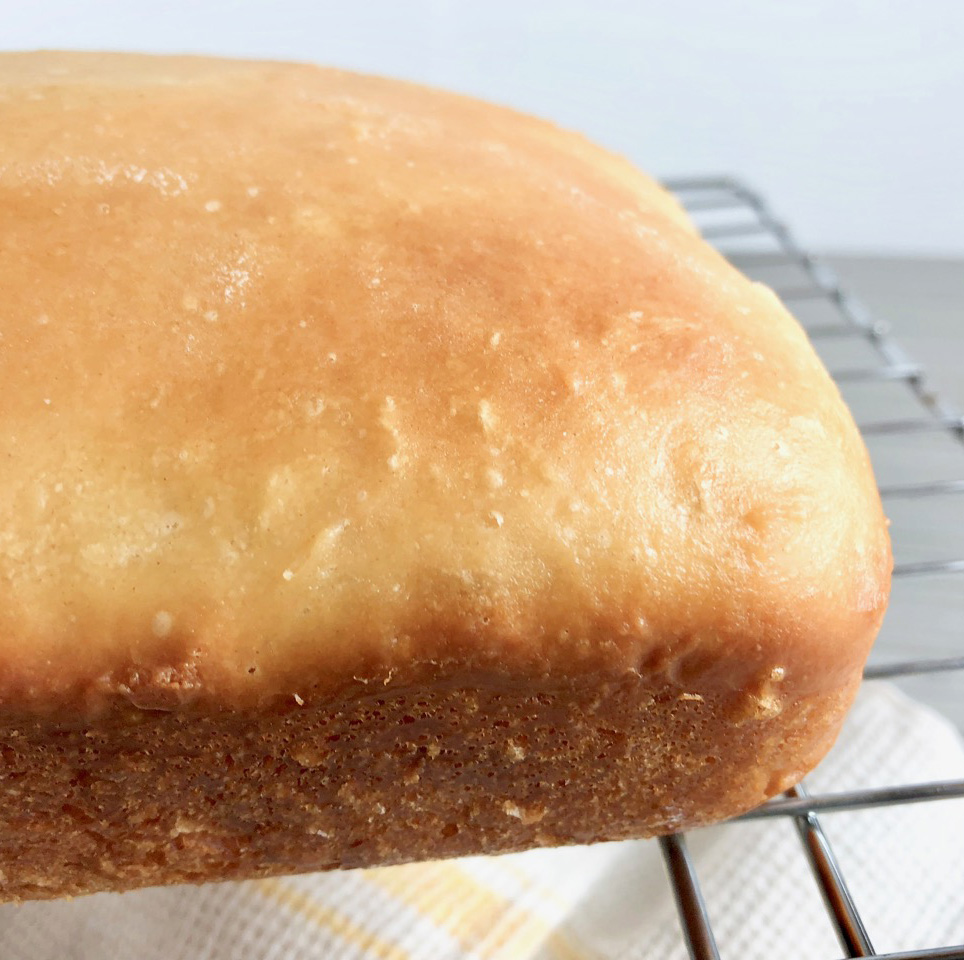
Now is the best part-eating it! We prefer eating it warm, just out of the oven. It is a more delicate bread, but still great a few days later to use making a sandwich!
Note: I have also modified the recipe and used whole wheat flour instead of bread flour. It produces a more dense bread and doesn’t rise as much, but still yummy! I also noticed that it took a little longer to bake it thoroughly.
I honestly am not that familiar with gluten-free bread or baking. I do know that the starter is gluten-free, so I’d be interested to see if anyone tries this bread recipe with a gluten-free flour and how it does.
Let me know what you think! Enjoy!

Looks delicious.
LikeLike
Can’t wait to try this recipe.
LikeLike